Building a home is an exciting journey, but it helps to know what to expect along the way. From preparing the site to adding the finishing touches, each stage plays a key role in bringing your vision to life. This guide breaks down the home-building process step by step, giving you a clear idea of how long each stage takes and what’s involved.
Planning and Preparation
How do you start building a new house in Australia?
Building a new home in Australia begins with careful planning to avoid costly mistakes. Here’s a step-by-step guide to get started:
Set a Budget
Determine your total budget, including land, construction costs, and additional expenses such as landscaping, permits, and interior furnishings. It’s essential to allow a contingency fund of at least 10–15% for unexpected costs.Secure Land
The block of land you choose impacts your home’s design. Consider location, proximity to amenities, land size, zoning regulations, and topography. If the land is in a bushfire-prone or flood zone, additional requirements will apply.Engage Professionals
Consult a building designer, architect, or project home builder early on. They can help refine your ideas and assess what’s achievable within your budget and on your block.Obtain Permits and Approvals
Every new build in Australia requires council approval. Depending on your location, you may need to apply for planning permits, building permits, or specific environmental clearances. This step ensures your project adheres to all local building codes.Finalise Your Home Design
Collaborate with your builder or designer to create a home that aligns with your lifestyle, budget, and land. Focus on layout efficiency, sustainability, and energy efficiency to create a design that is both functional and future-proof.Choose a Builder
Select a licensed builder with a solid track record and good reviews. Compare quotes and ensure the builder provides a comprehensive contract that covers materials, timelines, and warranties.
What factors should you consider when selecting a home design?
Choosing a home design is one of the most exciting yet critical stages of the building process. To find the perfect design, factor in the following:
Lifestyle Requirements:
Consider how you live now and how your needs might evolve. Think about:
The number of bedrooms and bathrooms.
Entertainment areas like open-plan living spaces or alfresco zones.
Storage options such as walk-in wardrobes or a butler’s pantry.
Special needs like a home office, gym, or space for pets.
Orientation
In Australia, energy-efficient homes often use passive solar design principles. Ensure living areas face north for optimal natural light and thermal comfort, while bedrooms and utility areas can face south or west.
Block Size and Shape
The land size and layout will influence your design. Narrow or sloping blocks may require innovative solutions, such as split-level homes or multi-storey layouts, while large, flat blocks offer more flexibility.
Budget Constraints
Be realistic about your financial limits. A single-storey home with a straightforward design will generally cost less to build than a custom or multi-level home.
Aesthetics and Style
Decide on an architectural style that reflects your taste, whether contemporary, Hamptons, coastal, or minimalist. Ensure it aligns with neighbourhood trends or any design covenants in the area.
Local Council Regulations
Verify local planning and building requirements, such as height restrictions, setbacks, or materials allowed in your area. Some estates enforce strict facade styles or landscaping rules.
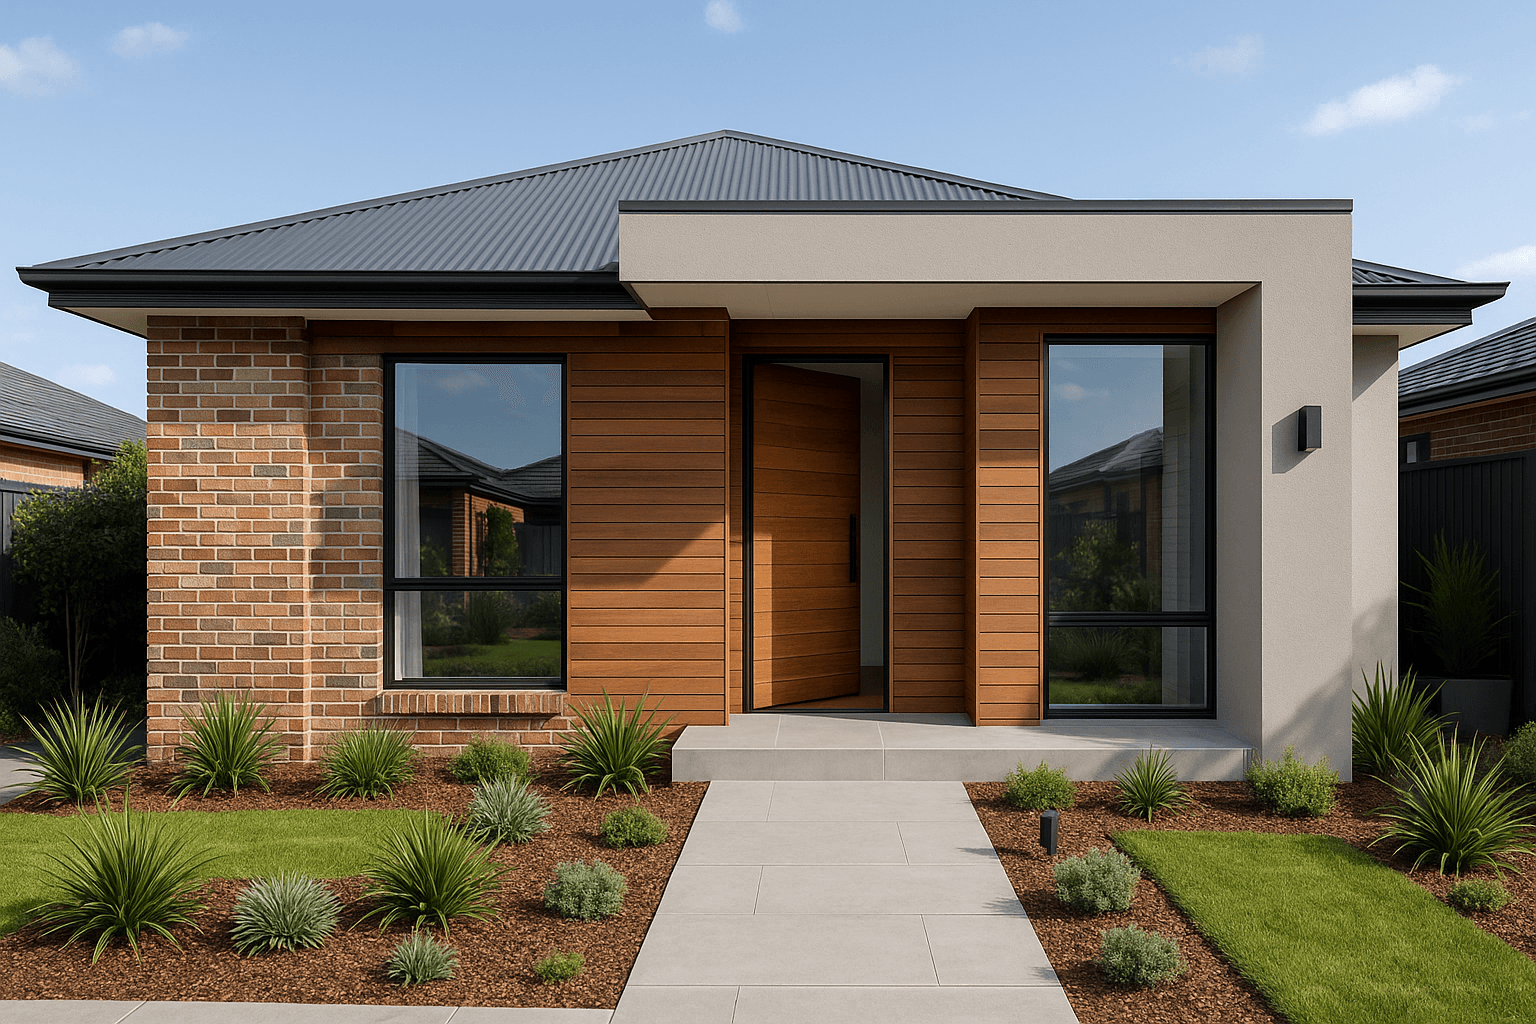
What is a facade, and why is it important for your home design?
A facade is the front exterior of a building, particularly the part that faces the street or public space. It typically includes elements like the entrance, windows, doors, roofline, and construction materials. The facade can also incorporate features such as balconies, verandas, or architectural details that give the home character.
When designing a facade, factors like style, functionality, climate (e.g., sun orientation, weather conditions), and local building codes are all important. It’s essential to strike the right balance between creating a beautiful look and ensuring it’s practical and energy-efficient.
Why is a facade important?
Street Appeal: The facade is the first thing people see, significantly impacting your home’s visual presence and resale value. A cohesive design can make your home stand out in the neighbourhood.
Reflection of Style: It sets the tone for your interior design and expresses your personality. You can choose between classic, modern, industrial, or Hamptons-inspired facades.
Functionality: The facade affects the home’s energy efficiency. Strategic placement of windows, shading, and insulation can reduce heating and cooling costs.
Compliance: Many neighbourhoods or estates require specific facade designs or materials to maintain a uniform look in the area.
Work closely with your designer or builder to balance aesthetics, functionality, and local regulations to achieve the best outcome.
Which house style is the most cost-effective to design and build in Australia?
The most cost-effective house style to design and build in Australia is a single-storey, rectangular home with a simple roofline. Here’s why this style is affordable:
Simplicity: Designs with minimal structural complexity—such as flat or gabled roofs and open-plan layouts—require fewer materials and less labour.
Energy Efficiency: Compact, single-storey homes are easier to insulate and heat or cool, making them cost-effective in the long term.
Standard Inclusions: Many project builders offer standard plans for single-storey homes, reducing the cost of customisation.
Ease of Construction: Single-level designs eliminate the need for staircases, additional structural supports, and scaffolding, which add to building costs.
While single-storey homes are typically the most economical, homeowners can still save on two-storey builds by choosing straightforward layouts and avoiding unnecessary customisation.
How to assess if your land is suitable for construction?
Before committing to a design, you need to confirm your land is ready for construction. Follow these steps:
Soil Testing (Geotechnical Assessment)
A professional soil test will determine the soil’s composition and stability. Poor soil may require expensive engineering solutions, such as deep foundations or stabilisation.Slope and Topography
Assess whether the land is flat or sloped. Steep sites can incur higher costs due to earthworks, retaining walls, and specialised designs to prevent water runoff.Drainage and Flood Risk
Check for natural water drainage or whether the site is prone to flooding. Council flood maps can help identify risks. A flood-prone block may require elevated construction or additional drainage systems.Bushfire and Environmental Considerations
If the land is in a bushfire-prone zone, you must comply with strict building codes, such as fire-resistant materials and landscaping. Similarly, heritage overlays or conservation zones may limit development options.Zoning and Building Restrictions
Local council zoning regulations dictate what can be built on the land, including maximum height, setbacks, and usage. Ensure your intended design complies with these rules.Access to Utilities and Services
Confirm that the land can access essential utilities like water, electricity, and sewerage. You may need to factor in costs for connections or off-grid solutions for rural or regional areas.
Documentation and Regulations
What documentation is required when building a home?
Before construction begins, you’ll need detailed documents outlining how your home will be built. These documents guide the builder, ensure compliance with regulations, and help avoid costly mistakes.
Here’s what’s required:
Architectural Drawings – These include floor plans, elevations, sections, and detailed construction drawings of the house.
Engineering Plans – Structural engineers provide specifications for foundations, load-bearing walls, roof trusses, and other critical elements. These plans ensure your home is safe and compliant with building codes.
Site Plan – Shows the position of the home on the block, including boundaries, setbacks, driveways, landscaping, and stormwater drainage.
Energy Efficiency Report (NatHERS or BASIX) – Depending on your state, you may need an energy assessment to confirm your home meets minimum sustainability requirements.
Specifications Document – A written breakdown of materials, fixtures, and finishes that will be used in the build. This document helps avoid confusion between homeowners and builders.
Building Permit Plans – Finalised drawings submitted to the local council or a private certifier to obtain approval for construction.
Bushfire Attack Level (BAL) Assessment (if applicable) – Required if your home is in a bushfire-prone area to ensure it meets fire safety requirements.
Geotechnical Report (Soil Test) – Determines the soil type and necessary foundation design to ensure structural integrity.
Engineering and Energy Compliance Certificates – Certifications from professionals confirming that the home meets relevant standards and regulations.
These documents form the foundation of a smooth building process. Without them, construction cannot legally begin.
What permissions or approvals are required before starting construction?
Before breaking ground on your new home, you’ll need council approvals, permits, and compliance checks. The specific requirements vary by state, but generally, you’ll need:
Planning Approval (Development Approval – DA)
Required if your home design doesn’t comply with local zoning rules or overlays (e.g., heritage, environmental).
Assesses site suitability, setbacks, height restrictions, and impact on neighbours.
Building Permit (Construction Approval – BA)
Ensures your home meets the National Construction Code (NCC) and Australian Standards.
Issued by a private or council-appointed building surveyor.
Bushfire, Flood, or Environmental Approvals (if applicable)
Homes in bushfire-prone, flood-prone, or environmentally sensitive areas need extra approvals.
This may involve using fire-resistant materials or raising the home to avoid flooding.
Driveway and Crossovers Approval (if required by local council)
If your driveway connects to a public road, you might need council approval to ensure proper drainage and road safety.
Asset Protection Permit (if required by your council)
Some councils require this to ensure public infrastructure (footpaths, nature strips) isn’t damaged during construction.
Septic or Sewerage Connection Approval (for rural blocks)
If your land isn’t connected to the main sewerage, you’ll need approval for a septic system.
The approval process can take weeks or months, so it’s best to start early and work with a building professional to navigate the paperwork efficiently.
How do the Australian Standards for Building and Construction apply to building a home?
The Australian Standards (AS) is a set of legally enforceable guidelines that dictate how materials, construction methods, and safety measures must be implemented in residential construction. They ensure homes are structurally sound, energy-efficient, and safe to live in. Here’s how they apply to building a home:
Structural Integrity & Safety
AS 1684 – Covers timber-framed construction. Ensures that wooden structures are durable and can withstand Australian weather conditions.
AS 2870 – Regulates residential slabs and footings, ensuring foundations are strong enough for different soil conditions.
Fire and Safety Compliance
AS 3959 – Governs building in bushfire-prone areas, specifying materials and designs to reduce fire risk.
AS 3786 – Requires smoke alarms in all homes to enhance fire safety.
Electrical and Plumbing Standards
AS 3000 – Covers electrical wiring to prevent faults and hazards.
AS 3500 – Regulates plumbing and drainage systems to ensure safe water supply and waste disposal.
Energy Efficiency and Sustainability
NatHERS & BASIX (NSW): Homes must have a minimum 7-star energy rating to reduce heating and cooling costs.
AS 4055 – Determines wind loads on buildings, ensuring homes are built to withstand local wind conditions.
Worksite Safety and Construction Practices
AS 45001 – Covers workplace health and safety, ensuring construction workers operate in a safe environment.
These standards are mandatory, and failing to comply can result in fines, delays, or costly rebuilds. The builder, architect, and building surveyor are responsible for ensuring that your home meets all Australian Standards.
What planning and building permits are required when building a home?
Building a home in Australia involves securing the appropriate permits to ensure your project complies with local, state, and national regulations. The two primary permits required are Planning Permits and Building Permits, but additional approvals may be needed depending on your location, type of construction, and site characteristics. Let’s break this down:
Planning Permit (Development Approval – DA) (if required)
Assesses whether your proposed home meets local council zoning laws and environmental overlays.
Required if you want to build outside standard zoning regulations (e.g., exceeding height limits, reducing setbacks).
Some areas, such as heritage precincts or environmentally sensitive zones, require special approvals.
Building Permit (Construction Approval – BA)
This ensures your home meets the National Construction Code (NCC) and Australian Standards.
Required for all new homes, renovations, and significant structural changes.
Issued by a building surveyor, not the council.
Additional permits may include:
Demolition Permit (if removing an existing structure before building).
Septic Tank or Sewerage Connection Permit (for rural properties not connected to main sewerage).
Driveway/Crossover Permit (if altering access to a public road).
Tree Removal Permit (if protected vegetation needs to be cleared for construction).
Some builders handle permit applications on your behalf, but it’s important to understand the process so you can avoid unexpected delays.
Costs and Budgeting
How much does it cost to build a house in Australia?
Building a home in Australia typically costs between $1,800 and $5,000 per square metre, depending on location, design, and finishes. On average, a standard 3-bedroom house can cost between $350,000 and $600,000, while a high-end custom build can go well beyond $1 million. However, these figures don’t include the cost of land, site preparation, or additional features like landscaping and fencing.
Want to build in a major city? Expect to pay more due to higher labour and material costs. Building in a regional area? Costs might be lower, but transportation of materials can add up.
What are the key factors that influence building costs?
Size and Design – Larger homes with complex designs cost more due to additional materials and labour.
Location – Building in metro areas tends to be pricier than in regional towns due to higher wages and land costs.
Materials – Standard brick veneer is more affordable than high-end finishes like stone or custom timber cladding.
Labour Costs – Trades like electricians, plumbers, and carpenters have varying rates based on demand and experience.
Site Conditions – Sloping or rocky blocks require more preparation, increasing excavation and foundation costs.
Inclusions and Finishes – Basic fixtures and fittings keep costs down, while premium benchtops, flooring, and cabinetry add thousands.
Energy Efficiency Requirements – Homes needing higher energy ratings may require additional insulation, glazing, or solar panels.
Is it more affordable to build upwards or outwards?
Generally, building outwards (a single-storey home) is more cost-effective than building upwards. A second storey requires extra structural reinforcement, stairs, and additional engineering, which can add $50,000 to $150,000+ to your budget.
However, building upwards might be the better option if:
Your block is small, and you need to maximise space.
You want to preserve your backyard or outdoor areas.
The land is sloped, making a sprawling layout impractical.
Building Out (Single Storey): Generally cheaper per square metre since it avoids expensive structural reinforcements. However, a larger footprint means higher costs for land, excavation, and site preparation.
Building Up (Double Storey): More expensive due to additional engineering, staircases, and load-bearing structures. However, it saves on land costs and allows for a bigger backyard.
How can you customise your home design without exceeding your budget?
Customising your home doesn’t have to mean blowing your budget. A few smart choices can give you a personalised feel without unnecessary costs.
Prioritise Key Features – Spend on the things that matter most, like an open-plan kitchen or extra storage, and save on non-essentials.
Use Cost-Effective Materials – Engineered stone benchtops instead of marble, laminate cabinetry instead of solid timber – small swaps can save thousands.
Plan for Future Upgrades – If the budget is tight, consider staging your upgrades (e.g., installing standard light fittings now and upgrading later).
Keep the Floor Plan Simple – Fewer walls, standard ceiling heights, and avoiding excessive angles will help reduce costs.
Be Smart with Windows and Doors. Large windows and sliding doors are beautiful but costly. Strategic placement of natural light can achieve the same effect for less.
Building Timeline and Process
How long does it take to build a house in Australia?
On average, it takes 6 to 12 months to build a house in Australia, but this timeline can vary based on the design's complexity, the house's size, and site conditions. A custom-designed home may take longer than a standard project home.
What are the key stages of the home-building process?
Building a home is typically broken down into five main stages. Here's a breakdown of each, including how long each stage might take:
Stage 1: Base (Foundation & Slab Work)
The site is prepared, with earthworks done to level the land.
Foundations are dug, and the slab (concrete base) is poured.
If needed, the foundation is reinforced with footings or piers.
How long does it take:
Typically, 2 to 4 weeks for a flat site; however, this can be longer for sloped or problematic sites.
Stage 2: Frame (Structural Work)
The skeleton of the house is constructed: walls, roof trusses, and floor frames are installed.
External framing is done, and internal wall frames are erected.
How long does it take:
This stage generally takes 4 to 6 weeks, but it can vary depending on the size and complexity of the design.
Stage 3: Lock-Up (Weatherproofing)
The home is sealed from the elements: windows and doors are installed, roofing is completed, and the house is made “lockable” (hence the name).
Plumbing rough-ins, such as pipes for water and drainage, are done.
How long does it take:
4 to 6 weeks, depending on the weather and availability of materials.
Stage 4: Fixing (Interior Fit-Out)
This is when the interior begins to take shape: plasterboard (gyprock) is installed on walls and ceilings, electrical wiring is fitted, and the kitchen, bathroom, and cabinetry are installed.
Flooring, tiling, and paint finishes begin during this phase.
How long does it take:
4 to 8 weeks. The timeframe can extend depending on the level of customisation, such as high-end finishes or special features.
Stage 5: Completion (Finishing Touches)
Final inspections are carried out, ensuring everything is to standard.
Painting, carpentry, and landscaping are completed.
The house is cleaned and prepped for handover to the owner.
Any minor touch-ups are made.
How long does it take:
2 to 4 weeks. Delays may occur depending on weather conditions or final touch-ups that need to be addressed.
Factors that can delay the building process
Weather – Heavy rain, storms, or extreme temperatures can halt work, especially during framing and roofing.
Supply Chain Issues – Delays in material delivery or shortages (e.g., timber, steel, or appliances) can cause setbacks.
Site Conditions – Uneven ground, poor soil quality, or the need for extensive earthworks can add time to the foundation phase.
Permitting Delays – If permits take longer than expected to be approved or if there are issues with inspections, construction could be delayed.
Labour Shortages – Skilled tradespeople, like electricians and plumbers, can be in high demand, which may cause delays in the fixing and fit-out stages.
Design Changes – Any changes made to the design after construction starts can delay progress and affect material ordering.
It's always wise to account for these potential delays and allow some flexibility in your timeline.
Site-Specific Considerations
What are the pros and cons of building on a sloping block?
Pros of Building on a Sloping Block
Stunning Views: Sloping blocks often offer excellent views, which can be a considerable advantage when positioning windows and outdoor areas.
Natural Drainage: Water naturally runs off sloped sites, potentially reducing the risk of flooding (although drainage must still be carefully planned).
Architectural Opportunities: A sloping site provides opportunities for innovative designs like split-level homes or homes with basement garages, which can take advantage of the slope.
Privacy: Depending on the surrounding area, building on a slope can give you more privacy from neighbours or street noise.
Increased Value: Well-designed homes on sloping blocks often have a unique appeal and may increase the property’s value due to their scenic location and distinctive design.
Cons of Building on a Sloping Block
Higher Construction Costs: The additional site preparation and structural work, such as retaining walls or extra excavation, can significantly increase the cost of building on a slope.
Complex Foundations: Sloping land requires special foundations, such as pier and beam or stepped foundations, which can be more complicated and costly.
Difficult Access: Heavy machinery and materials might have trouble accessing the site, particularly if the slope is steep or narrow.
Landscaping Challenges: Slopes can make landscaping tricky, and you may need to invest in erosion control, terracing, or retaining walls.
Limited Space for Traditional Layouts: Standard home designs may not work well on a sloping block, requiring custom plans that fit the unique topography.
What are the most common mistakes to avoid when designing and building a home?
Building a home is a big project, and it’s easy to make mistakes that can be costly or frustrating. Here are some of the most common mistakes people make when designing and building a home and how to avoid them.
1. Not Considering Future Needs
People often design their homes based on current needs without thinking about future requirements. Families change, and needs evolve, so it’s essential to consider the following:
Will your family grow in the next 5–10 years?
Could you need an extra bedroom, office, or living space down the line?
Will accessibility be a concern as you get older?
Tip: Design with flexibility in mind. Add options for future expansion or functional spaces that adapt to changing lifestyles.
2. Ignoring Site-Specific Challenges
Every block of land is unique, so failing to account for its specific conditions can lead to headaches. This includes:
Soil conditions, slope, and drainage issues.
Local weather patterns (e.g., winds, sun exposure).
Easements or restrictions on the land.
Tip: Get a thorough site assessment before you start. A geotechnical report can identify potential issues early.
3. Underestimating Costs
People often underestimate the total cost of building a home, including permits, fees, site prep, landscaping, and upgrades. Not budgeting properly can lead to cost blowouts.
Tip: Always work with a detailed cost breakdown and build in a contingency fund (around 10-15%) for unexpected expenses.
4. Poor Planning of the Floor Plan
A poorly planned floor plan can cause a lot of frustration down the road. Common mistakes include:
Rooms that are poorly positioned for natural light or privacy.
Flow issues between spaces (e.g., the kitchen being far from the dining room or garage).
Lack of storage space or poorly designed storage solutions.
Tip: Spend time planning the layout carefully. Work with an architect or designer to optimise the space's flow and maximise natural light.
5. Failing to Account for the Future Maintenance
Some design choices that look good initially can lead to costly maintenance later, such as:
High-maintenance finishes (e.g., expensive timber that needs constant upkeep).
Complex rooflines or structures that are difficult to maintain.
Tip: Choose materials and designs that are durable and easy to maintain long-term, especially for areas exposed to the elements.
6. Skimping on Quality for Short-Term Savings
Sometimes, homeowners try to cut costs by choosing cheaper materials or opting for low-quality finishes. However, this can lead to higher costs in the long run due to maintenance, repairs, or the need to replace things earlier than expected.
Tip: Focus on the essentials. Invest in quality for key structural elements like foundations, framing, and energy-efficient insulation.
7. Not Consulting with Professionals Early Enough
Trying to cut corners by not hiring professionals or delaying consultation can result in poor design or construction decisions. Skipping advice from architects or engineers can lead to design flaws or even legal issues.
Tip: Involve key professionals early in the process (architects, designers, engineers, etc.) to ensure all aspects are addressed.

